We all know WordPress is one of the widely used and famous blogging platform. It has its own advantages and disadvantages. It really helped many businesses and bloggers to build their online presence with ease. Starting a WordPress blog is pretty simple with new and advanced hosting admin panels and scripts. Bluehost is one of the widely used hosting provider for WordPress. In this article we are going to explain how easy it is to start your own WordPress blog using an auto installer.
Recommended: Installing WordPress in your local computer.
Before you start reading, make sure that you already have an account with bluehost. You can signup for bluehost choosing any of their hosting plan. You will also get a free domain along with hosting. So choose this domain name wisely if you are buying basic hosting plan from bluehost.
If you are not yet signed up for bluehost.com web hosting, you can follow this small bluehost review before registering with bluehost.
Sign Up Process
Registering an account in bluehost is a 5 min process. Visit bluehost website and select appropriate hosting plan that suites your needs.
How to Choose Best Hosting Plan for Your New Blog
It is one of the most important part when starting a new blog. Think twice before you decide which hosting plan that you are going to choose.
Do I need a VPS hosting for my new blog?
What is dedicated web hosting?
Which hosting plan should I buy? etc
All above questions may arise in your mind during this. In our recommendation you should start with a small hosting plan if you are newbie where you are expecting small traffic during first 6 months of your blogging career. Also I don't recommend vps or dedicated hosting for your new blog.
Here we are taking bluehost shared web hosting plans as a way to explain what to look before buying hosting for your new blog.
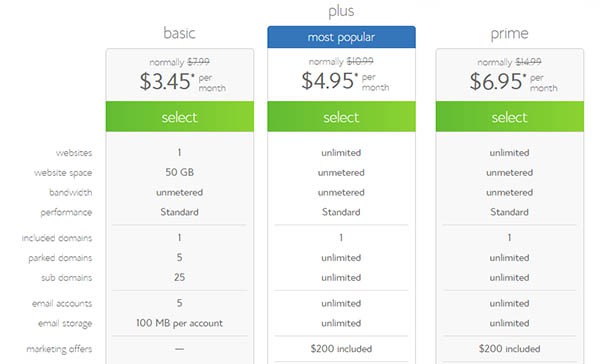
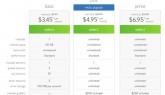
There are total 3 shared web hosting plans. Basic, plus and prime. Each plans have their own advantages. So think about your requirements.
You can choose basic plan : If you are starting your blog as an experiment. Or you just have to stick with a single blog. Basic plan have maximum one domain and website size limit of 50GB. But you never need that 50GB space for your blog. In my last 6 years of web development and blogging maximum space that I used in a website is almost 25GB. So space is not a concern here, but number of domains, so think about it.
Plus plan: That is one of the most suitable plan for beginners who have lots of interest in blogging. This option allow us to create multiple blogs using same plan. This plan also have unlimited space and bandwidth. And will also get $24/yr worth extras.
Prime Plan: It is almost similar to plus plan but have an extra feature like free domain privacy and sitebackup pro.
Choose Domain Name
We already have a simple article that might help you to find a good name for your blog. If you are creating bluehost account for the first time you can claim free domain name.
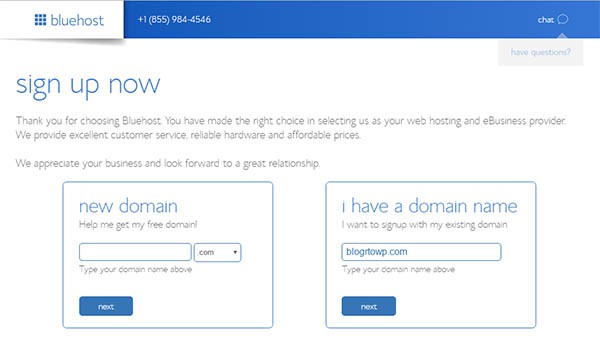
You can start searching domain name from here or just type domain name and continue as shown below in this pic.
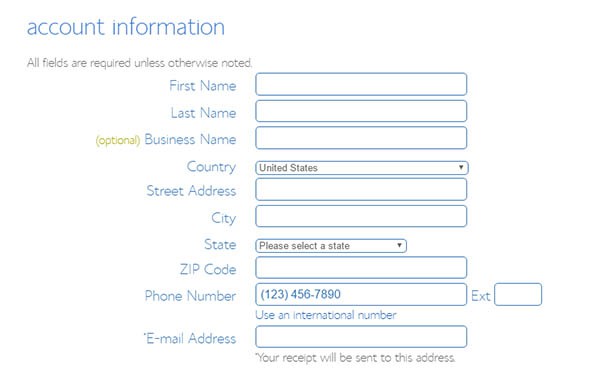
In next step you will be asked to enter all account related information and package information. Fill all those details taking your time and pay using any of payment options available.
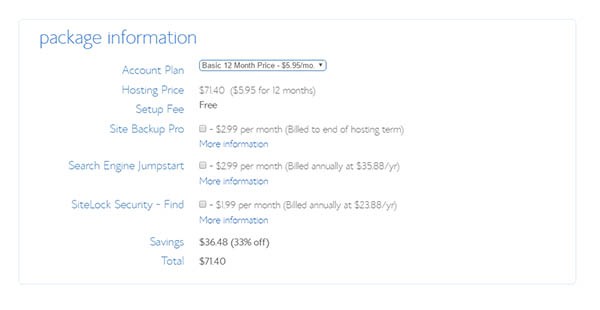
Choose account plan. You have to pay higher monthly rate if you are going to signup for just a year. For a year you have to pay only $71.40 to get basic hosting from bluehost, which is worth trying.
Bluehost allows 2 types of payments. Credit card payment and paypal payment. So just select appropriate option and complete the process. You will get confirmation mail as shown below.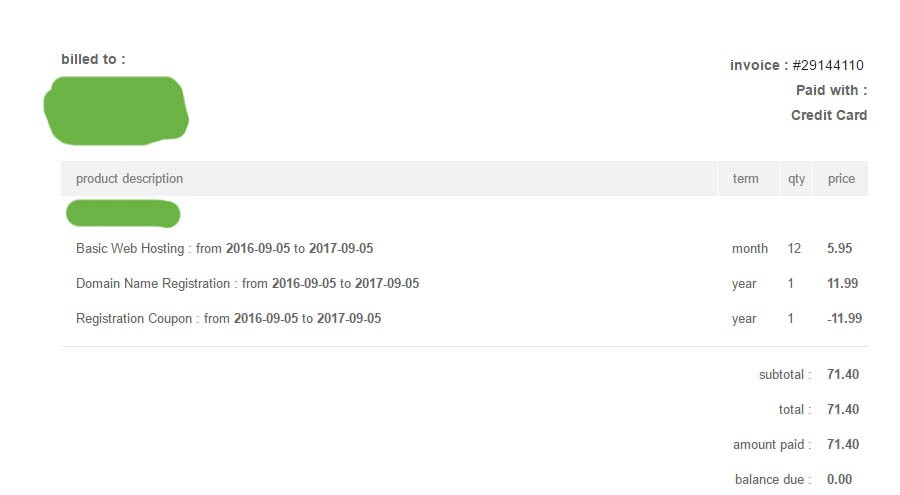
That is it, you created an account and ready to install WordPress.
Install WordPress Blog on Bluehost
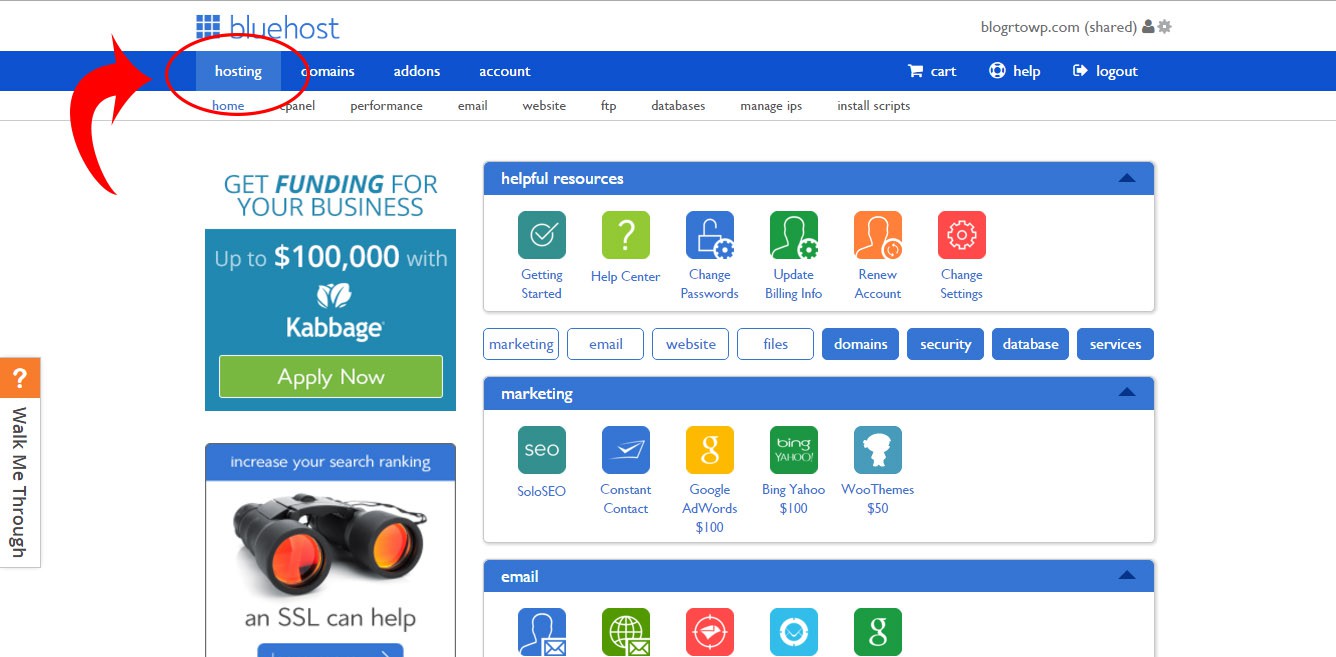
First of login to bluehost cpanel.
Here it is screenshot of bluehost cpanel and you can hit hosting section to access all hosting related settings.
After that find out Install WordPress button which is under WordPress section. Here it is the screenshot.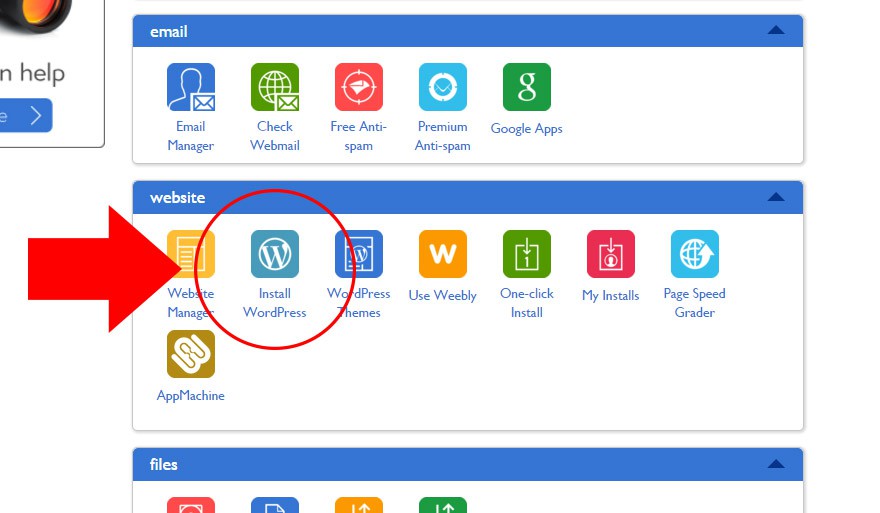
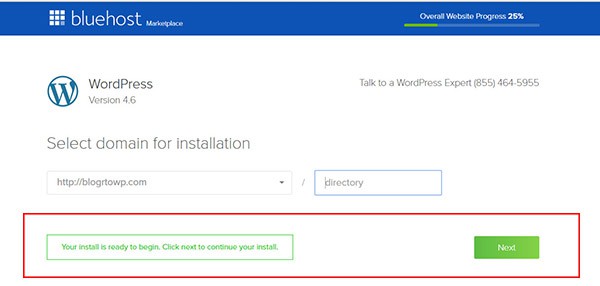
That will redirect you to mojomarketplace WordPress installation area. Just click get started button to start installation. Which will land you in a page like this where you can select your domain name.
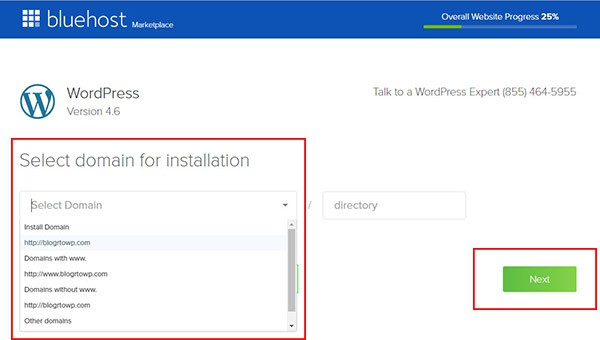
In above wizard you can select domain name with www extension or just naked domain. It is all up to you, and choose the best one that looks great for your site and mention directory if you are installing in a directory just like domain.com/blog/.
After choosing the right option, it will ask for site name, username and password.
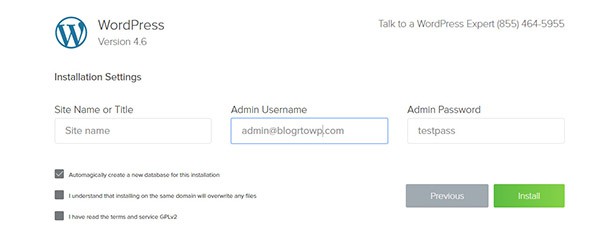
So you are ready to install WordPress, check all terms and conditions and click install button. Don't forget to change Site Name, Admin username and Admin password. That will give more security to your newly created blog. We can change all these settings after installing blog.
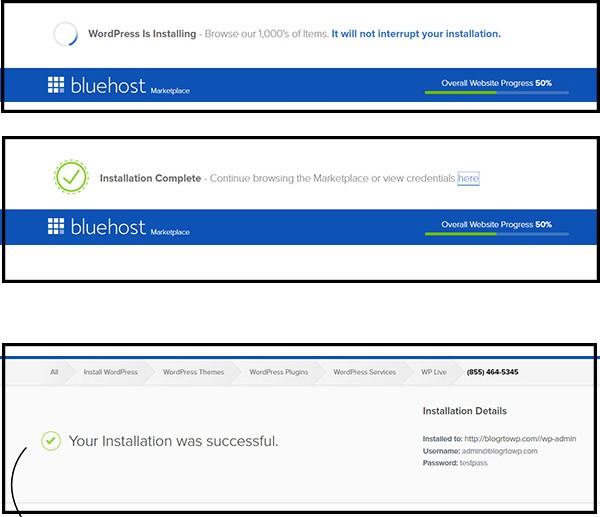
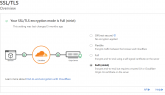
After clicking installation it will take some time to complete whole process. You will see screens as shown below before WordPress completely installed on your root domain and you will see a message saying "Your installation was success full". Ignore the 65% installation progress. Now you can login to your WP site using domain.com/wp-admin/ panel as shown in the last screen of this installation wizard.
So we successfully installed WordPress in a bluehost hosting. It is pretty simple right? If you have any suggestion or advice please add it as comment.


honey